How to Change Guitar Strings: Pro Guide with Tuning Tips
Introduction
Does your guitar sound dull even when "in tune"? Old strings sabotage your sound quality and tuning stability – a universal headache for players at all levels. But swapping them out shouldn’t feel like defusing a bomb.
This step-by-step guide eliminates the guesswork from string replacement. By the end, you’ll confidently:
- Identify essential tools (many already in your home)
- Restring your guitar safely without damaging delicate parts
- Use TunerNinja’s free online tuner to achieve ±0.1 cent tuning accuracy
No expensive gear or luthier training needed – just actionable techniques developed by seasoned players. Ready to transform your guitar’s voice? Let’s dive in.
Tune your guitar perfectly after restringing →

Signs You Need New Strings
Before you grab your tools, how do you know it's time for a change? Waiting too long can make even the best guitar sound lifeless. Look for these telltale signs:
- Dull, Lifeless Tone: This is the #1 indicator. Fresh strings sound bright, crisp, and resonant. Old strings sound muddy and lack sustain. If your chords sound flat even when in tune, your strings are likely the culprit.
- Visible Grime or Discoloration: Look closely at the strings over the fretboard. Do you see dark, grimy spots where your fingers make contact? That's a buildup of oil, sweat, and dirt, which deadens the string's vibration.
- Corrosion or Rust: Any visible rust is an immediate red flag. Rusted strings feel rough, sound terrible, and can cause extra wear on your frets.
- Tuning Instability: If you find yourself constantly retuning your guitar, your strings may have lost their ability to hold proper tension. They've been stretched to their limit and can no longer stay stable.
Choosing the Right Strings
Walking into a music store can be overwhelming with all the string options. The right choice depends on your guitar type, playing style, and desired tone. Here's a quick ninja guide:
String Gauge: Light vs. Heavy
Gauge refers to the thickness of the strings.
- Light Gauges (.010-.047): Easier to bend and press down, making them ideal for beginners and players who use a lot of lead techniques. They produce a brighter tone but have less volume and sustain.
- Medium/Heavy Gauges (.012-.056+): Require more finger strength but reward you with louder volume, longer sustain, and a richer, fuller tone. They are a favorite among strummers and acoustic players.
String Material: Finding Your Sound
- For Acoustic Guitars:
- 80/20 Bronze: Bright, crisp, and articulate. They sound fantastic right out of the package but can lose their sparkle relatively quickly.
- Phosphor Bronze: Warmer and darker than 80/20 Bronze. They have a slightly longer lifespan and are a popular all-around choice.
- Nylon: Exclusively for classical or flamenco guitars. Never put steel strings on a classical guitar, as the tension can damage the neck and bridge.
- For Electric Guitars:
- Nickel-Plated Steel: The industry standard. They offer a balanced tone with a snappy attack, suitable for almost any genre.
- Pure Nickel: Warmer, smoother, and have a more vintage tone. Perfect for blues, jazz, and classic rock.
- Stainless Steel: The brightest and most corrosion-resistant option. They have a sharp, cutting tone and a slick feel.
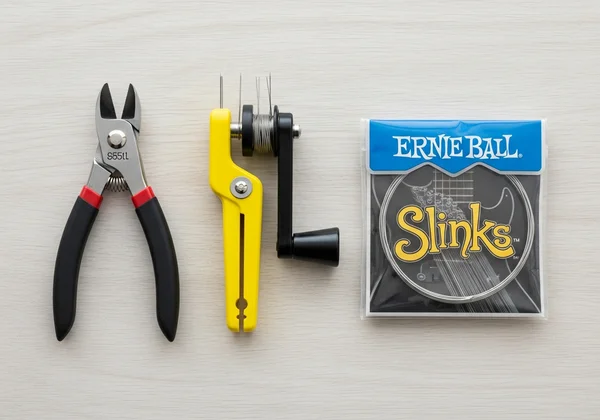
Essential Tools for Safe String Replacement
Beginner guitarists often ask: 'Do I need specialized tools?' The answer? Not necessarily. But these two items save time and protect your instrument:
Why Wire Cutters & String Winder Save Time
- Wire cutters ($5–$10) cleanly trim excess string after tuning. Scissors fray metal strands, leaving sharp ends that scratch your guitar or fingers.
- String winder ($5) speeds up tuning by 3x. Rotate pegs manually, and you'll fight hand cramps before reaching perfect pitch.
Pro Tip: Use the winder’s notch to lift acoustic guitar bridge pins – no more prying with butter knives!
The Hidden Danger of Over-Tightening Strings
New players often snap strings by turning tuning pegs too aggressively. This also risks:
- Warping lightweight guitar necks (especially on cheaper models)
- Stripping peg gears, leading to costly repairs
- Creating "false tuning" where strings detune minutes after tightening
"Ninja Wisdom": Turn pegs gradually when installing new strings, checking tension every 2–3 rotations.
Get precise tuning feedback with TunerNinja →
Step-by-Step String Replacement Walkthrough
Removing Old Strings Without Damaging Bridge Pins
Acoustic Guitar Method:
- Loosen each string until slack (no tension) using tuning pegs.
- Insert string winder’s notch under the bridge pin.
- Leverage gently upward – forcing it risks cracking the bridge.
- Pull string free from pin slot.
Electric Guitar Method:
- Unwind strings fully from tuning posts.
- Push strings through bridge/tailpiece from above.
- Discard old strings (coil them to avoid accidental stabs!).
Securing New Strings with "Ninja Knots" for Stability
-
Acoustic/Electric Bridge Anchoring:
- Thread string through bridge/tailpiece.
- Bend a 2-inch "kink" near the end (creates friction anchor).
- Feed kinked end back under itself before tightening.
-
Tuning Post Locking Technique ("Ninja Knot"):
- Leave 2–3 inches of slack past the tuning post.
- Wrap string under itself once before winding.
- Wind downward toward the headstock (4–5 neat coils).
This prevents slippage – the #1 reason new strings fall out of tune.
Tuning & Stabilizing New Strings with TunerNinja
Brand-new strings stretch considerably during their first 48 hours. This causes rapid detuning – not a flaw in your technique!
Why New Strings Detune Rapidly (and How to Fix It)
- Here's the simple science: Metal strings elongate under tension, requiring 3–5 "stretch cycles" to settle.
- Pro Stabilization Method:
- Tune normally with TunerNinja’s ultra-accurate tool.
- Gently tug strings upward (away from fretboard) at the 12th fret.
- Retune immediately.
- Repeat 3x until tuning holds after stretching.
Using TunerNinja’s Live Waveform to Spot Tuning Drift
Most tuners show pitch accuracy. But TunerNinja’s visual waveform goes deeper, exposing micro-fluctuations in real time.
- Play an open string.
- Watch the soundwave graph beneath the tuner needle.
- Stable string = smooth, consistent wave peaks.
- Unstable string = jagged, shifting peaks.
This lets you detect subtle drifting before your ear notices. Try it now →

Perfect your tuning stability with TunerNinja →
Common Mistakes (and Ninja Fixes)
Even with the right steps, a few common slip-ups can sabotage your hard work. Here’s how to avoid them.
- Mistake #1: Overwinding the Pegs. Too many wraps look messy and can cause the string to bind and slip.
- Ninja Fix: Aim for 3-5 neat, downward coils on each tuning post. This provides the perfect balance of grip and stability.
- Mistake #2: Cutting Strings Too Short. If you trim the excess before winding, you might leave yourself with nothing to grip the post.
- Ninja Fix: Always wind the string first, tune it close to pitch, and then cut the excess. Leave about a half-inch of string past the post.
- Mistake #3: Improperly Seating Acoustic Bridge Pins. On an acoustic, the string’s ball end can get caught on the bottom of the pin instead of anchoring against the bridge plate inside. When you tune up, it will suddenly slip with a loud POP.
- Ninja Fix: After inserting the pin, give the string a gentle tug upward to make sure the ball end is snug against the wood inside the guitar.
Struggling with tuning stability after trying these fixes? Check TunerNinja’s real-time diagnostics →
Putting It All Together
Say goodbye to dull tones and endless re-tuning – fresh strings mastered with care transform every practice into pure joy. Remember:
- Safety first: Use wire cutters and gradual tightening.
- Stability second: Lock strings with "Ninja Knots."
- Precision third: TunerNinja’s real-time feedback ensures accuracy even during string stretching.
Your guitar’s new strings crave perfection. Give them TunerNinja’s studio-grade accuracy!
FAQ Section
How Often Should I Change Guitar Strings?
- Practice daily? Change every 4–6 weeks.
- Play weekly? Change every 3 months.
- Telltale signs:
- Discoloration (dark spots where oils touch strings)
- Tuning instability even after stretching
- Metallic smell fading (yes, fresh strings have a scent!)
Can I Tune Without a Physical Tuner Using TunerNinja?
Absolutely! TunerNinja transforms your phone/computer into a professional tuner:
- Visit our free online tuner directly in your browser →
- Select your instrument.
- Grant microphone access.
- Pluck a string – the needle shows real-time pitch accuracy.
It’s 100% free, no app downloads required.
Can Old Strings Damage My Guitar?
While they won't cause major structural damage, old strings can be harmful in other ways. The corrosion and grime on them act like fine-grit sandpaper, accelerating wear on your frets over time. More importantly, they damage your motivation by making your instrument sound bad and feel unpleasant to play.
Why Won’t My Guitar Stay Tuned After Restringing?
Common fixes:
- "Stretch cycle" incomplete: Use the tug-and-retune method explained above.
- Slipping strings: Ensure "Ninja Knots" at tuning posts.
- Nut/bridge friction: Rub graphite (pencil lead) into string slots.
- Temperature swings: Avoid leaving guitars near heaters/windows.
Still struggling? Verify tuning accuracy with TunerNinja →